Picture this: you’re making a delicious pesto, but you're out of fresh basil! A quick trip to the grocery store solves the problem, but what if you could extend the life of that store-bought basil and create an endless supply? The good news is, with a little know-how, you absolutely can! Growing Basil From Store-Bought: A Complete Guide So, can you really grow basil from store bought bunches? Absolutely! It's a fantastic way to save money, reduce waste, and enjoy fresh basil whenever you need it. However, the success of growing basil from store bought depends on a few key factors. This article will walk you through the entire process, from selecting the right basil to harvesting your homegrown leaves. We'll cover everything you need to know to successfully propagate basil from your grocery store haul. Selecting the Right Store-Bought Basil for Propagation Not all store-bought basil is created equal when it comes to propagation. To increase your ...
That distinct anise-licorice aroma wafting through your garden... imagine creating that yourself, from just a tiny seed! Growing Thai basil is surprisingly easy, and starting from seed allows you to nurture these aromatic herbs from the very beginning, tailoring their environment to thrive. Plus, there’s something deeply satisfying about watching those first tiny leaves unfurl, knowing you helped bring them to life. So, are you ready to embark on this fragrant adventure? Let's dive in and discover how to grow Thai basil from seed.
Why Grow Thai Basil From Seed?
While you can purchase Thai basil seedlings from nurseries, starting from seed offers several advantages. You have greater control over the variety you grow. You aren't limited to what's available locally and can explore unique and heirloom Thai basil types. Growing Thai basil from seed is often more cost-effective, especially if you plan to grow a large quantity or multiple plantings throughout the season. Also, you can ensure the seedlings are free from pests and diseases. Finally, the act of nurturing a plant from seed to harvest is incredibly rewarding.
Understanding Thai Basil
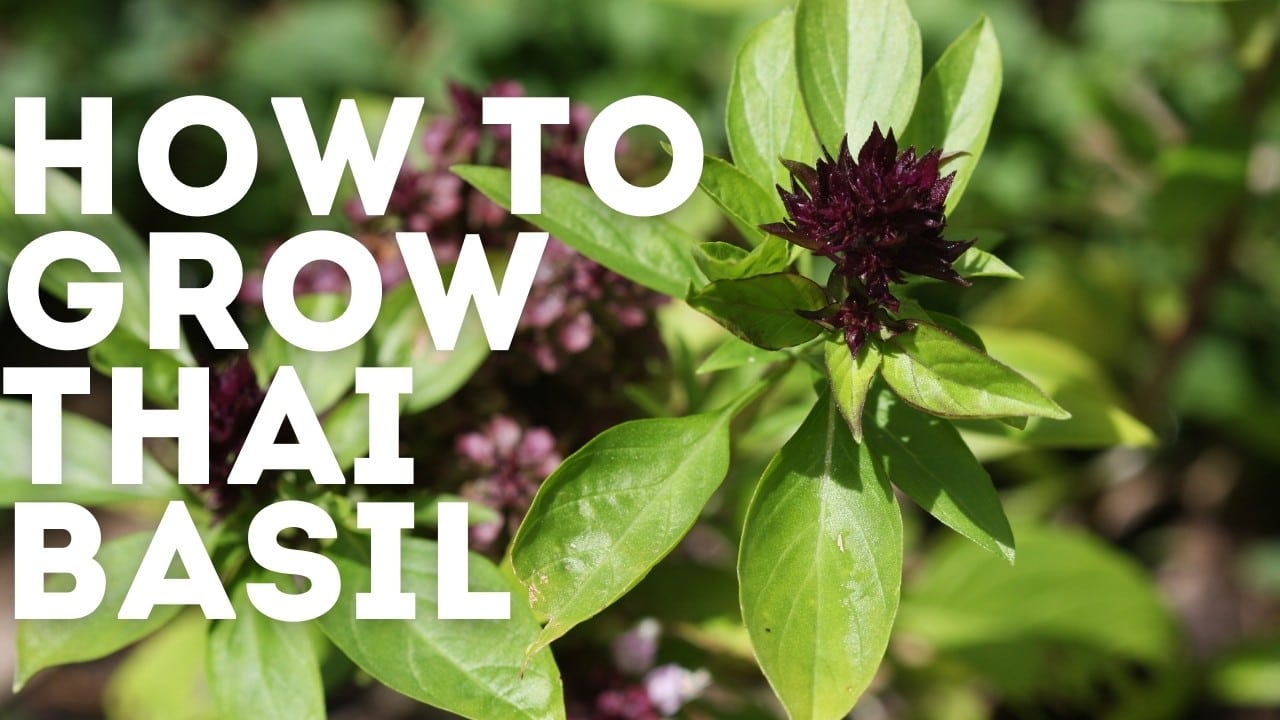
Before diving into the "how-to," let's understand what makes Thai basil unique. Thai basil (Ocimum basilicumvar.thyrsiflora) is distinct from sweet basil, the type commonly used in Italian cuisine. It boasts a more assertive flavor profile with prominent anise and licorice notes. Its leaves are also more pointed and have a slightly sturdier texture. Thai basil’s purple stems and bracts add an ornamental touch to any garden. It is a warm-weather annual, meaning it completes its life cycle in one growing season. Understanding these characteristics will help you create the ideal environment for your Thai basil to flourish.
How To Grow Thai Basil From Seed:A Step-by-Step Guide
Now, for the practical part! Here's a detailed guide on how to grow Thai basil from seed successfully:
1. Gathering Your Supplies
Before you even touch a seed, make sure you have everything you need. This will streamline the process and prevent frustrating interruptions. You'll need:
- Thai basil seeds: Purchase from a reputable source to ensure viability and authenticity. Look for varieties you enjoy, such as 'Siam Queen' or 'Horapha.'
- Seed starting tray or small pots: Choose containers with drainage holes to prevent waterlogging.
- Seed starting mix: This fine-textured, sterile mix is ideal for delicate seedlings. Avoid using garden soil, which can be too heavy and may contain pathogens.
- Spray bottle: For gentle watering.
- Warm, sunny location or grow lights: Thai basil needs plenty of light to germinate and thrive.
- Optional: Heat mat: Can speed up germination, especially in cooler climates.
2. Sowing the Seeds
This is where the magic begins!
- Moisten the seed starting mix: Dampen the mix thoroughly but don't soak it. It should feel like a wrung-out sponge.
- Fill your containers: Fill your seed starting tray or pots with the moistened mix, leaving about a half-inch of space at the top.
- Sow the seeds: Sprinkle the tiny Thai basil seeds evenly over the surface of the soil. They don’t need to be buried too deep.
- Gently cover the seeds: Lightly sprinkle a thin layer of seed starting mix over the seeds, just enough to cover them.
- Water gently: Use a spray bottle to mist the surface of the soil thoroughly. Avoid pouring water directly, as this can dislodge the seeds.
- Provide warmth and light: Place the tray or pots in a warm, sunny location or under grow lights. If using a heat mat, place it under the tray.
3. Germination and Early Care
Patience is key! Germination typically takes 5-10 days. During this time, keep the soil consistently moist but not waterlogged. Here's what to do:
- Monitor moisture: Check the soil daily and mist with a spray bottle whenever the surface feels dry.
- Provide consistent warmth: Maintain a soil temperature of around 70-75°F (21-24°C) for optimal germination.
- Ensure adequate light: Once the seedlings emerge, provide at least 6 hours of direct sunlight or 12-16 hours of grow light exposure daily.
4. Transplanting Seedlings
Once your seedlings have developed a few sets of true leaves (the leaves that appear after the initial seed leaves), they're ready to be transplanted into larger pots or directly into your garden. The timing depends on your local climate and the last expected frost date. A good rule of thumb is to wait until the soil temperature consistently reaches 60°F (15°C).
Hardening Off
Before transplanting outdoors, it's crucial to "harden off" the seedlings. This gradually acclimates them to the outdoor environment, reducing the risk of shock. Over a period of 7-10 days, gradually increase the amount of time the seedlings spend outdoors, starting with just a couple of hours in a sheltered location and gradually increasing the exposure to sunlight and wind. This process is essential for strong, healthy plants.
Transplanting into Pots or Garden
When transplanting, choose a location that receives at least 6 hours of direct sunlight daily. The soil should be well-draining and fertile. Space the plants about 12-18 inches apart to allow for adequate air circulation. Dig a hole slightly larger than the root ball, gently remove the seedling from its container, and place it in the hole. Backfill with soil and water thoroughly. Mulch around the plants to help retain moisture and suppress weeds.
5. Ongoing Care for Growing Thai Basil
Once your Thai basil is established, ongoing care involves regular watering, fertilizing, and pest control. Water deeply whenever the top inch of soil feels dry to the touch. Avoid overhead watering, which can promote fungal diseases. Fertilize every 2-3 weeks with a balanced liquid fertilizer. Pinch off the flower buds to encourage bushier growth and more flavorful leaves. Regularly inspect the plants for pests such as aphids and spider mites, and take appropriate action if necessary. The goal is to provide consistent water, nutrients, and support that the Thai basil needs to thrive.
Troubleshooting Common Issues When Growing Thai Basil From Seed
Even with the best intentions, problems can arise. Here's how to tackle some common issues:
- Poor germination: Could be due to old seeds, cold soil, or overwatering. Use fresh seeds, ensure adequate warmth, and avoid waterlogging.
- Damping off: A fungal disease that causes seedlings to collapse. Use sterile seed starting mix and provide good air circulation.
- Yellowing leaves: Could indicate nutrient deficiency, overwatering, or underwatering. Adjust your watering and fertilizing practices accordingly.
- Pests: Aphids, spider mites, and whiteflies can infest Thai basil. Use insecticidal soap or neem oil to control them.
Harvesting and Using Your Thai Basil
You can start harvesting Thai basil leaves as soon as the plants have reached a decent size. Simply snip off the leaves as needed, being careful not to remove more than one-third of the plant at a time. Regular harvesting encourages bushier growth and prevents the plants from becoming leggy. Thai basil is best used fresh, but it can also be dried or frozen for later use. It is a star in Southeast Asian cuisine. Add it to stir-fries, curries, soups, and salads. Its unique flavor adds a delightful complexity to any dish.
To keep your garden thriving and ensure proper watering, consider using theGarden Hose 75 FT with 10-Function Nozzle, Leak-proof Metal Connector Water Hose. This durable 75-foot garden hose with a 10-function nozzleis a practical solution for your gardening needs, making watering your Thai basil and other plants a breeze. The leak-proof metal connectorensures a reliable connection, and its lightweight, kink-free design makes it easy to maneuver around your garden. You can find it on Amazon here:https://amzn.to/3Yv E0Bo
Conclusion
Growing Thai basil from seed is a rewarding experience that allows you to enjoy fresh, flavorful herbs right from your garden. With a little patience and attention to detail, you can successfully cultivate these aromatic plants and add a touch of Southeast Asian flavor to your culinary creations. So go ahead, grab some seeds, and start your Thai basil journey today!