Picture this: you’re making a delicious pesto, but you're out of fresh basil! A quick trip to the grocery store solves the problem, but what if you could extend the life of that store-bought basil and create an endless supply? The good news is, with a little know-how, you absolutely can! Growing Basil From Store-Bought: A Complete Guide So, can you really grow basil from store bought bunches? Absolutely! It's a fantastic way to save money, reduce waste, and enjoy fresh basil whenever you need it. However, the success of growing basil from store bought depends on a few key factors. This article will walk you through the entire process, from selecting the right basil to harvesting your homegrown leaves. We'll cover everything you need to know to successfully propagate basil from your grocery store haul. Selecting the Right Store-Bought Basil for Propagation Not all store-bought basil is created equal when it comes to propagation. To increase your ...
Imagine having fresh, fragrant basil on hand whenever you need it, even in the dead of winter. No more sad, wilted grocery store basil! Growing basil indoors is surprisingly easy and rewarding. With a little know-how, you can enjoy the vibrant flavor and aroma of homegrown basil all year round. Let's dive into the wonderful world of indoor basil cultivation and discover how to bring a touch of summer into your home, no matter the season.
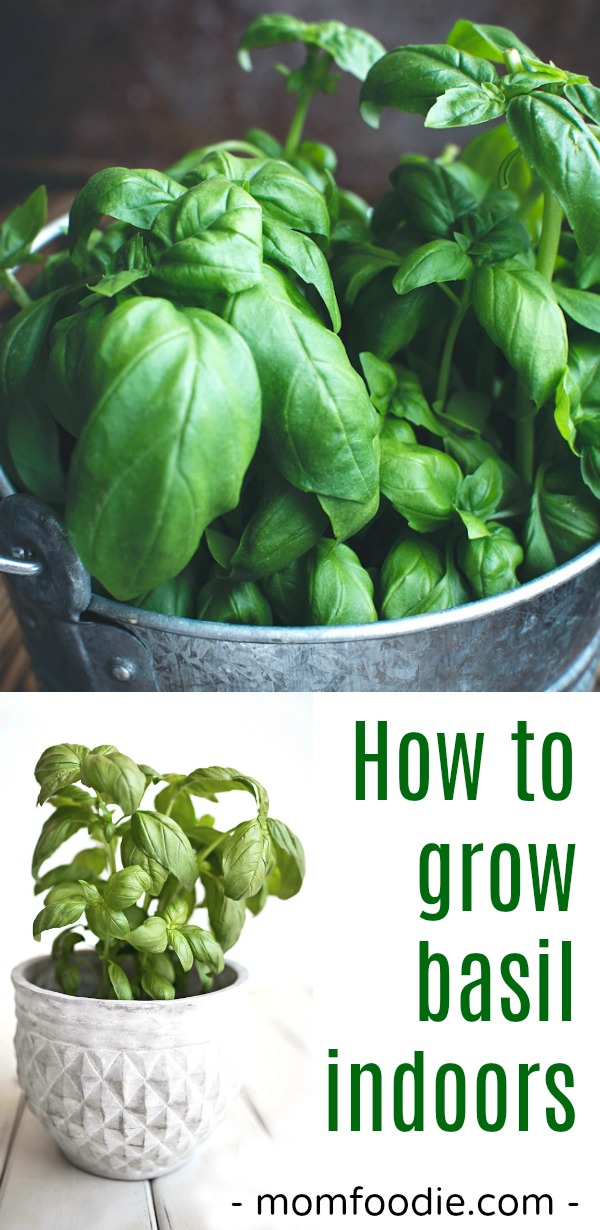
How to Grow Basil Indoors: A Comprehensive Guide
Choosing the Right Basil Variety for Indoor Growing
Not all basil varieties are created equal when it comes to indoor cultivation. Some basil types are more compact and better suited for container growing than others. Understanding the different types is the first step to a thriving indoor basil garden.
Popular Basil Varieties for Indoor Gardens:
- Sweet Basil: The most common type, perfect for pesto and Italian dishes. It's relatively easy to grow indoors and offers that classic basil flavor.
- Dwarf Basil: As the name suggests, dwarf basil varieties stay small and compact, making them ideal for small spaces and container gardening. 'Spicy Globe' and 'Minette' are popular choices.
- Lemon Basil: Offers a delightful citrusy aroma and flavor, perfect for teas, salads, and Asian-inspired cuisine. It thrives indoors with proper care.
- Thai Basil: Characterized by its anise-like flavor and purple stems, Thai basil is a staple in Southeast Asian cooking. It's relatively easy to grow indoors and adds a unique touch to your culinary creations.
- Purple Basil: Adds a beautiful pop of color to your indoor garden with its deep purple leaves. It has a slightly spicier flavor than sweet basil and makes a stunning addition to salads and garnishes.
When selecting your basil variety, consider your culinary preferences, available space, and the amount of light your indoor garden receives. Dwarf basil varieties are generally recommended for beginners due to their compact size and ease of care. However, with proper care and attention, you can successfully grow any type of basil indoors.
Setting Up Your Indoor Basil Garden: Light, Soil, and Containers
Creating the right environment is crucial for successful indoor basil growing. Basil needs adequate light, well-draining soil, and a suitable container to thrive. Let's explore each of these factors in detail.
Light: The Key to Lush Basil Growth Indoors
Basil requires at least 6-8 hours of direct sunlight per day. If you don't have a sunny windowsill, consider using grow lights.
- Natural Light: A south-facing window is ideal for providing ample sunlight. Rotate your basil plant regularly to ensure even growth.
- Grow Lights: If natural light is limited, invest in a full-spectrum LED grow light. Position the light a few inches above the plant and keep it on for 12-14 hours per day.
Insufficient light can lead to leggy growth and pale leaves. Observe your basil plant closely and adjust the light accordingly. If the stems are stretching towards the light source, it's a sign that it needs more light.
Soil: Choosing the Right Growing Medium
Basil prefers well-draining soil that is rich in organic matter. Avoid heavy clay soils that retain too much moisture.
- Potting Mix: Use a high-quality potting mix specifically formulated for container gardening. These mixes typically contain a blend of peat moss, perlite, and vermiculite, which provide excellent drainage and aeration.
- DIY Mix: You can also create your own potting mix by combining equal parts of potting soil, compost, and perlite.
Ensure that the soil is slightly acidic to neutral, with a p H range of 6.0 to
7.5. Avoid using garden soil, as it may contain pests, diseases, and weed seeds.
Containers: Selecting the Perfect Pot for Your Basil Plant
Choose a container that is at least 6 inches in diameter and has drainage holes at the bottom. This allows excess water to drain away, preventing root rot.
- Material: Clay pots are porous and allow for better air circulation, which is beneficial for basil. Plastic pots are less expensive and retain moisture better, but they can also lead to overwatering if you're not careful.
- Size: As your basil plant grows, you may need to transplant it to a larger container. Choose a pot that is at least 2 inches larger in diameter than the current pot.
Consider using self-watering pots, which can help to regulate moisture levels and prevent overwatering. However, be sure to monitor the water level regularly to avoid soggy soil.
Planting and Caring for Your Indoor Basil Plants
Once you have set up your indoor basil garden, it's time to plant your basil seeds or seedlings and provide them with the care they need to thrive. Consistent care is the key to healthy and productive basil plants.
Planting Basil Seeds and Seedlings Indoors
You can start basil from seeds or purchase seedlings from a local nursery. Starting from seeds is a more economical option, but it requires more time and effort.
Starting from Seeds:
- Sow Seeds: Sow basil seeds ¼ inch deep in moist potting mix.
- Maintain Moisture: Keep the soil consistently moist but not soggy. Use a spray bottle to mist the soil regularly.
- Provide Warmth: Basil seeds germinate best at temperatures between 70°F and 80°F. Use a heat mat to provide bottom heat if necessary.
- Thin Seedlings: Once the seedlings have emerged, thin them to one plant per cell or pot.
Transplanting Seedlings:
- Gently Remove: Carefully remove the basil seedling from its container, being careful not to damage the roots.
- Plant in Pot: Dig a hole in the potting mix that is large enough to accommodate the root ball.
- Water Thoroughly: Gently place the seedling in the hole and backfill with soil. Water thoroughly to settle the soil.
Whether you start from seeds or seedlings, be sure to harden off your basil plants before transplanting them outdoors. This involves gradually exposing them to outdoor conditions for a week or two.
Watering Your Basil Plants Correctly
Basil prefers consistently moist soil, but it doesn't like to be waterlogged. Water your basil plants when the top inch of soil feels dry to the touch.
- Watering Frequency: Water deeply, allowing excess water to drain out of the bottom of the pot. Avoid watering the leaves, as this can promote fungal diseases.
- Check Soil Moisture: Check the soil moisture regularly and adjust your watering schedule accordingly. Basil plants may need more frequent watering during hot, dry weather.
Overwatering is a common mistake that can lead to root rot. If the leaves of your basil plant are turning yellow or wilting, it may be a sign of overwatering. Reduce the frequency of watering and ensure that the pot has adequate drainage.
Fertilizing for Indoor Basil Growth
Basil is a heavy feeder and benefits from regular fertilization. Use a balanced liquid fertilizer, diluted to half strength, every two to four weeks.
- Liquid Fertilizer: Choose a fertilizer that is specifically formulated for herbs or vegetables. Avoid using fertilizers that are high in nitrogen, as this can promote leafy growth at the expense of flavor.
- Organic Options: Alternatively, you can use organic fertilizers such as compost tea or fish emulsion. These options are gentler on the environment and provide a slow-release source of nutrients.
Avoid over-fertilizing, as this can lead to fertilizer burn. If the leaves of your basil plant are turning brown or crispy, it may be a sign of over-fertilization. Flush the soil with water to remove excess fertilizer.
Harvesting and Pruning Your Basil for Continued Growth
Harvesting and pruning are essential for promoting healthy and productive basil plants. Regular harvesting encourages new growth and prevents the plant from becoming leggy.
When and How to Harvest Basil
Harvest basil leaves when they are at least 4 inches long. Pinch off the top leaves, just above a leaf node. This encourages the plant to branch out and produce more leaves.
- Harvest Regularly: Harvest basil regularly, even if you don't need the leaves. This will keep the plant producing new growth.
- Avoid Over-Harvesting: Avoid removing more than one-third of the plant's leaves at any one time.
The best time to harvest basil is in the morning, after the dew has dried. This is when the leaves have the highest concentration of essential oils.
Pruning Basil for Bushier Growth
Prune your basil plant regularly to promote bushier growth and prevent it from flowering. Flowering basil produces smaller, less flavorful leaves.
- Pinch Off Flowers: Pinch off any flower buds as soon as they appear.
- Prune Regularly: Prune the plant back to about half its size every few weeks. This will encourage new growth and keep the plant compact.
Pruning is especially important for indoor basil plants, as they tend to become leggy if not pruned regularly.
Troubleshooting Common Problems When Growing Basil Indoors
Even with the best care, you may encounter some problems when growing basil indoors. Knowing how to troubleshoot these issues can help you keep your basil plants healthy and productive.
Pests and Diseases
Indoor basil plants are susceptible to a variety of pests and diseases, including aphids, spider mites, whiteflies, and fungal diseases.
- Aphids: Small, soft-bodied insects that suck sap from the leaves. Wash them off with a strong stream of water or use insecticidal soap.
- Spider Mites: Tiny pests that create webs on the leaves. Increase humidity and use insecticidal soap.
- Whiteflies: Small, white, fly-like insects that feed on plant sap. Use yellow sticky traps or insecticidal soap.
- Fungal Diseases: Caused by excessive moisture and poor air circulation. Improve air circulation and avoid overwatering. Use a fungicide if necessary.
Regularly inspect your basil plants for signs of pests or diseases. Early detection and treatment can prevent serious problems.
Nutrient Deficiencies
Nutrient deficiencies can also cause problems with indoor basil plants. Yellowing leaves, stunted growth, and poor flavor are all signs of nutrient deficiencies.
- Nitrogen Deficiency: Yellowing of older leaves. Fertilize with a balanced liquid fertilizer.
- Phosphorus Deficiency: Stunted growth and purple leaves. Fertilize with a fertilizer high in phosphorus.
- Potassium Deficiency: Yellowing of leaf edges. Fertilize with a fertilizer high in potassium.
Regularly fertilize your basil plants and monitor them for signs of nutrient deficiencies. Adjust your fertilization schedule as needed.
Enjoying Your Homegrown Basil: Culinary Uses and Storage Tips
Now that you have successfully grown basil indoors, it's time to enjoy the fruits (or rather, leaves) of your labor. Fresh basil adds a burst of flavor to a wide variety of dishes.
Culinary Uses of Fresh Basil
Basil is a versatile herb that can be used in many different ways.
- Pesto: A classic Italian sauce made with basil, garlic, pine nuts, Parmesan cheese, and olive oil.
- Salads: Basil adds a fresh, aromatic flavor to salads.
- Sauces: Basil is a key ingredient in many tomato-based sauces.
- Soups: Add basil to soups for a burst of flavor.
- Teas: Lemon basil and Thai basil make delicious and refreshing teas.
Experiment with different basil varieties to find your favorite flavor combinations. Thai basil, for example, is delicious in stir-fries and curries.
Storing Fresh Basil for Later Use
Fresh basil can be stored in several ways to preserve its flavor and aroma.
- Refrigeration: Place basil stems in a glass of water, like flowers, and cover the leaves with a plastic bag. Store in the refrigerator for up to a week.
- Freezing: Blanch basil leaves in boiling water for a few seconds, then plunge them into ice water. Dry the leaves and freeze them in a single layer on a baking sheet. Once frozen, transfer them to a freezer bag.
- Drying: Dry basil leaves in a dehydrator or oven at low heat. Store the dried leaves in an airtight container.
Freezing and drying basil can affect its flavor and texture. However, these methods are useful for preserving basil for longer periods of time.
Growing basil indoors is a rewarding experience that allows you to enjoy fresh, flavorful herbs year-round. By following these tips and techniques, you can create a thriving indoor basil garden and elevate your culinary creations. So, go ahead and get started – your taste buds will thank you!