Picture this: you’re making a delicious pesto, but you're out of fresh basil! A quick trip to the grocery store solves the problem, but what if you could extend the life of that store-bought basil and create an endless supply? The good news is, with a little know-how, you absolutely can! Growing Basil From Store-Bought: A Complete Guide So, can you really grow basil from store bought bunches? Absolutely! It's a fantastic way to save money, reduce waste, and enjoy fresh basil whenever you need it. However, the success of growing basil from store bought depends on a few key factors. This article will walk you through the entire process, from selecting the right basil to harvesting your homegrown leaves. We'll cover everything you need to know to successfully propagate basil from your grocery store haul. Selecting the Right Store-Bought Basil for Propagation Not all store-bought basil is created equal when it comes to propagation. To increase your ...
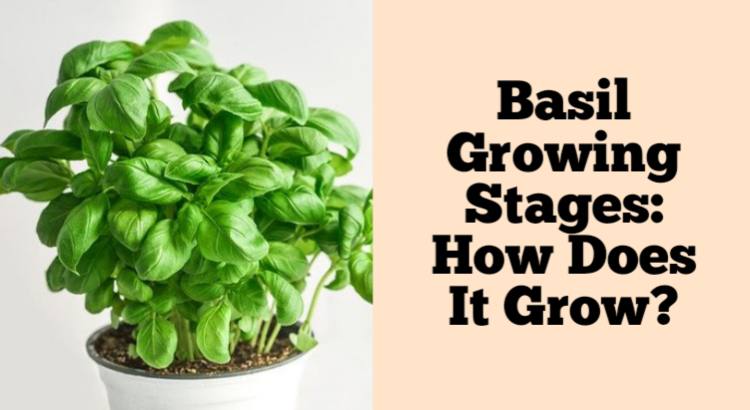
Ever dream of snipping fresh, fragrant basil leaves straight from your own garden to elevate your pasta sauce or summer salad? Growing basil is surprisingly simple, and understanding the different stages of its life cycle can make you a more successful and confident gardener. From tiny seeds to a lush, aromatic plant, let's explore the fascinating journey of basil growth together.
The Seed Stage: Starting Your Basil Journey
The very first step in growing basil plants is, of course, starting from seed. This is often the most exciting phase, as it marks the beginning of your basil-growing adventure. You have a few options when it comes to starting basil from seed: you can directly sow them into your garden bed (weather permitting) or start them indoors for a head start.
Starting Basil Seeds Indoors
Starting seeds indoors is generally recommended, especially if you live in a climate with a shorter growing season. This allows you to get a jumpstart on the growing process and ensures your basil plants are strong and healthy before transplanting them outdoors. Here's what you'll need:
- Seed starting tray or small pots: Choose containers with drainage holes.
- Seed starting mix: This is a sterile, lightweight mix that provides the perfect environment for germination. Avoid using garden soil, as it can be too heavy and may contain diseases.
- Basil seeds: Purchase high-quality seeds from a reputable source. Look for varieties that suit your taste and growing conditions.
- Spray bottle: For gentle watering.
- Warm location: Basil seeds need warmth to germinate, ideally between 70-80°F (21-27°C).
Once you have your supplies, follow these steps:
- Moisten the seed starting mix and fill your containers.
- Sow the basil seeds thinly on the surface of the soil. Basil seeds need light to germinate, so don't bury them too deeply.
- Gently press the seeds into the soil.
- Mist the soil with water to keep it moist but not soggy.
- Cover the tray or pots with a plastic dome or plastic wrap to create a humid environment.
- Place the tray in a warm location. A heat mat can be helpful to maintain the optimal temperature.
- Check the soil moisture daily and mist as needed.
Germination typically takes 5-10 days. Once the seedlings emerge, remove the plastic cover and provide them with plenty of light. A sunny windowsill or a grow light works well. If using a windowsill, rotate the tray regularly to prevent the seedlings from leaning towards the light.
Direct Sowing Basil Seeds
Direct sowing is possible once the soil has warmed up and all danger of frost has passed. Choose a sunny location with well-drained soil. Prepare the soil by loosening it and adding compost or other organic matter. Sow the basil seeds thinly in rows or groups, cover them lightly with soil, and water gently. Keep the soil moist until the seedlings emerge.
The Seedling Stage: Nurturing Young Basil Plants
Once your basil seeds have germinated, you've entered the seedling stage. This is a crucial time for your young plants, as they are still delicate and vulnerable. Proper care during this stage will set them up for success later on. Here are some key considerations:
Light
Basil seedlings need plenty of light to grow strong and healthy. If you're growing them indoors, provide them with at least 6-8 hours of direct sunlight per day. If you don't have enough natural light, use a grow light. When the time comes, you will definitely need a reliable way to water your basil. For ensuring your garden is properly cared for, consider areliable garden hose with multiple spray settings, like this 75 FT Garden Hose with 10-Function Nozzle, which offers leak-proof connectors and is designed to be kink-free. You can check it out here: https://amzn.to/3Yv E0Bo.
Watering
Keep the soil consistently moist, but not soggy. Overwatering can lead to root rot, while underwatering can cause the seedlings to dry out and die. Water gently at the base of the plants, avoiding wetting the leaves. A spray bottle is ideal for watering young seedlings.
Thinning
If you sowed your seeds too thickly, you'll need to thin them out to prevent overcrowding. This will give the remaining seedlings enough room to grow and develop. Use small scissors to snip off the weakest seedlings at the soil line. Aim for a spacing of about 1-2 inches between seedlings.
Fertilizing
Once the seedlings have developed their first set of true leaves (the leaves that look like miniature basil leaves), you can start fertilizing them with a diluted liquid fertilizer. Choose a fertilizer that is specifically formulated for seedlings, and follow the instructions on the label. Avoid over-fertilizing, as this can damage the delicate roots.
The Vegetative Stage: Growth and Development
The vegetative stage is when your basil plants really start to take off. During this stage, they focus on growing foliage and developing a strong root system. This is the time to provide them with the nutrients and environmental conditions they need to thrive.
Transplanting
If you started your basil seeds indoors, you'll need to transplant them outdoors once the weather has warmed up and all danger of frost has passed. Choose a sunny location with well-drained soil. Dig a hole that is slightly larger than the root ball of the seedling. Gently remove the seedling from its container and place it in the hole. Backfill with soil and water thoroughly. Space the plants about 12-18 inches apart.
Sunlight
Basil plants need at least 6-8 hours of direct sunlight per day. Choose a location that receives plenty of sunshine throughout the day. If you live in a hot climate, provide some afternoon shade to prevent the leaves from scorching.
Watering
Water deeply and regularly, especially during hot, dry weather. Basil plants prefer consistently moist soil, but avoid overwatering, as this can lead to root rot. Check the soil moisture regularly and water when the top inch of soil feels dry to the touch.
Fertilizing
Fertilize your basil plants every 2-3 weeks with a balanced fertilizer. Follow the instructions on the label. You can also add compost or other organic matter to the soil to provide a slow-release source of nutrients.
Pinching and Pruning
Pinching and pruning are essential for encouraging bushy growth and preventing the plants from flowering too early. When the plants are about 6 inches tall, pinch off the top set of leaves. This will encourage the plants to branch out and produce more leaves. You can also pinch off any flower buds that appear, as flowering will cause the plant to stop producing leaves.
The Flowering Stage: Harvesting and Maintaining
While basil is primarily grown for its leaves, it will eventually enter the flowering stage. Once your basil plants start to flower, the leaves will become less flavorful and the plant will eventually stop producing new leaves. However, you can still harvest the leaves and use them in cooking, and you can also save the seeds for planting next year.
Harvesting
Harvest basil leaves regularly throughout the growing season. Pinch or cut off the leaves at the stem, just above a set of leaves. This will encourage the plant to branch out and produce more leaves. You can harvest up to one-third of the plant at a time without harming it.
Preventing Flowering
To prolong the vegetative stage and keep your basil plants producing flavorful leaves, continue to pinch off any flower buds that appear. This will prevent the plant from focusing its energy on flowering and instead direct it towards producing more leaves.
Seed Saving
If you want to save seeds for planting next year, allow a few of your basil plants to flower. Once the flowers have dried and turned brown, you can harvest the seeds. Cut off the flower heads and place them in a paper bag. Allow them to dry completely, then shake the bag to release the seeds. Store the seeds in an airtight container in a cool, dry place.
By understanding these stages of growing basil plants, you'll be well-equipped to cultivate your own thriving basil garden and enjoy the fresh, aromatic flavors of this wonderful herb. Happy gardening!